Everything You Need to Know About Candle Making
Candles bring a special element to home decor. They bring an enjoyable scent alongside warm glow from the flame. Fridge designs and colors to choose from so that the candle possess a candle fitting your style. It is easy enough to have a candle supply anywhere. A great feeling you get get by employing a room filled with candles. It really is much simpler to make candles than you may think.

Typically three types of candles are produced and sold for own. Every time frame you see http://babieboomers.com most people might come up with yourself plagued by candle making information. Some are taper candles, which are manufactured by repeatedly dipping a wick into melted soy wax. Once the wick is heavy that isn’t wax, the candle is prepared. Other candles come by pouring wax onto a semi-permanent container, like a glass container. The candle is never taken at the container, unless it may be used along. Another type of candle uses candle making molds filled up with melted wax and permitted to cool. Type of mold is usually either peeled away or separated through final product using a releasing unit.
A double boiler or massive pot is needed. A smaller jug with a handle for melting and pouring wax are frequently needed. Next make sure you have a wooden stirrer, thermometer, soy wax and wicks. Lastly, you have your options of fragrances and color dyes.

Making candles can be regarded as a fun craft or a proficient source of money. Using the right candle molds can create a difference on the type of candles cultivated. The final resulting candles can look just great as anything found inside a store as well as the sense of satisfaction.
Gel waxes with a 0-3% density (considered low) is unique for candles contain a fragrance. It could also be poured into your candle molds using less temperature. Heavily saturated fragrance gel waxes work best with densities in the 3-5% multitude. Among all types, gel waxes are typically the most popular among many candle makers who ought to create candles containing decor. You can drop just about any object into your cooling gel wax to gift your candles an unique look. However, be cautious the materials you use to decorate your gel candles should not burn. Although gel wax is fun to along with there costly steps linked selecting the importance grade of gel wax for your candle.
Soybean oil is a liquid at room temperature range. That is useful info for our candles. We will learn that with by adding hydrogen, it becomes solid and suitable producing candles.
After your molds are prepped you are going to focus with the scents. For your cinnamon and nutmeg candles you’ll just add the new spices on the wax. The only scent that we need help to make it is the pumpkin, is much easier than you’d think.
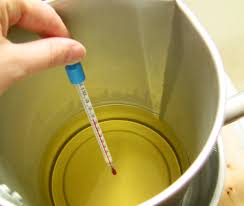
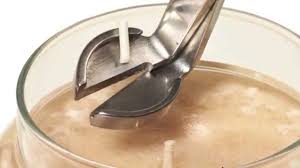
Alright, now put water in backside pan from the double furnace. Take the wax and get started to make the grade in to chunks and also them in the top pan in the double central heating boiler. Begin boiling the water and be sure that you stir the wax often. The wax should melt at around 150 degrees fahrenheit. Now when the wax has melted it will then be the period for add the scents ( I used an ocean scent), shade ( I oftentimes tried blue and green), and some of the water shells. Mix it all around very well, as a quick tip, add only an of color and fragrance at a time and stir well. This way you can avoid putting too much of either.
Instructions to Make Candles at Home [In 8 Easy Steps]
Christine Devereaux Evangelista
Candles immediately make any space cozier. However, a decent candle can run upwards of $15 to $20. Also, that can get pricey in the event that you are like me and have candles in most of the house.
However, I am here to impart to you that you can make candles at home. Furthermore, this DIY venture is useful for tenderfoots or veteran crafters.
Not only is making candles at home an incredible eco-accommodating alternative, however you can likewise make your own custom aromas and welcome your companions over to make a night out of it.
Custom made candles make extraordinary endowments, and you know your relatives really appreciate the blessing when they request that you make more candles each year!
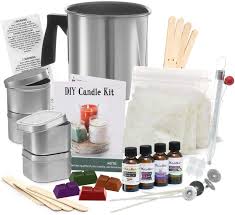
Get Your Supplies
Doubtlessly, you don’t as of now have the entirety of the light creation fundamentals at home, so you should do a touch of shopping.
Light Making Supply List:
*Soy Wax
*Light Wicks
*Fundamental Oils
*Chopsticks, popsicle sticks, pens or pencils (use what you have at home-no compelling reason to purchase)
*Elastic Bands
*Garments Pins
*Scissors
*Wooden Spoon (this should be devoted to your light creation supplies and ought not be utilized for food after you use it to make candles)
*Thermometer
*2 Pots (think twofold evaporator) – again this will end up being your flame pot, in every case great to look at Goodwill or utilize an old pot you couldn’t care less about any longer. You need an enormous one to place a tad of water in, and afterward you need a littler one (your pour pot) to liquefy the wax.
*Flame Jars/Containers – Condiment or jam containers work extraordinary, old light containers, or teacups work incredible. We like to go to Goodwill and take a look at the dishes they need to blend and match our containers; simply ensure they are glass. A plastic holder will melt.
*Paper or Paper Towels – It will get dirty and this makes the tidy up much simpler!
Before you start making your candles, it’s significant that you practice. This isn’t a DIY venture you need to enroll your child to assist you with.
You will manage HOT wax. It could hurt you so you should be cautious and ensure you are giving this undertaking your full focus.
Additionally, I have to make reference to, you ought to never leave a candle unattended. I don’t need to reveal to you why you recognize what could occur.
Likewise, I suggest covering whatever surface you will use to make your candles on with a paper. This will help with any wax that trickles over the side and trust me, it will occur. You will make a waxy jumble. Be that as it may, on the off chance that you are ready that the cleanup will be a breeze!
My recommendation is to peruse the directions first and comprehend the means before plunging into your DIY light creation venture.
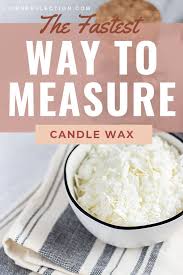
Stage 1 – Measure your Wax
soy wax
So as to know how much wax you have to make your candles you have to know what number of candles you are making.
Set out the entirety of your flame holders and fill them with wax. Void the wax into your wax pot and do that once more. You need twofold the measure of wax for each flame.
As a rule, 1 unit of liquefied wax or 2 units for strong wax
Leave the entirety of your tools out (on head of paper towels or paper) and spot a wick inside each vacant container/holder.
Stage 2 – Melt the Wax
liquefying soy wax
Since you have your wax allotted you can start to soften it.
Initially, fill your base (greater) pot most of the way with water. You don’t need your water to be near bubbling over so in the event that it fires crawling up, spill some of it out.
Include your thermometer and trust that the temperature will ascend to around 170 degrees. At that point include your wax gradually.
Mix the wax to forestall consuming and help it liquefy. It should take around 10-15 minutes to soften the entirety of the wax.
Stage 3 – Add Essential Oils
When the wax is totally softened, you can include your basic oils. A little goes far with basic oils. Contingent upon how solid you like your flame to smell will direct what number of drops. We like our candles to smell entirely solid, so I ordinarily include 15-20 drops for every candle.
This is going to take some testing; you will see a few oils are more fragrant than others. Be that as it may, on the off chance that you include an excessive amount of the candles won’t set appropriately and it will be a waste. It’s ideal to begin minimalistically with the oils and afterward include all the more once you figure out it.
This is additionally the time you can add some personalization to your candles.
In the event that you need to switch up to hues you can add a few pastels to the pot. Since they are wax-based, they will handily dissolve directly in.
Shading your candles can be precarious. Remember the shading that the softened wax looks won’t be a similar shading once it’s cooled. The shading will be more quieted once it solidifies.
Add more pastels to make a more dynamic liquefied shading in the event that you need rich-hued candles.

Stage 4 – Set your Wick and Pour in the Melted Wax
On the off chance that your wicks have fallen over aside of the container (which they will), move them back to the middle. They won’t remain set up totally, yet attempt to get them as focused as could reasonably be expected.
This is likewise your opportunity to add greater character to your candles!
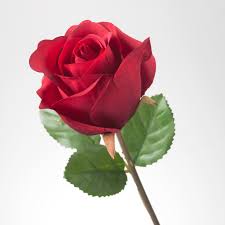
In our home, we love to add sparkle and dry blossoms to our containers before we include wax. You can likewise include some really busy pouring on the off chance that you are up for the test.
When you have your wicks and containers you can start to pour your wax. Keep in mind, this is hot wax and it can hurt you! Ensure your pets or youngsters are not near when you start the pouring cycle.
Gradually empty the wax into the container and top it off nearly to the edge. Don’t hesitate to include more sparkle or dried blossoms on the off chance that you need on head of the softened wax.
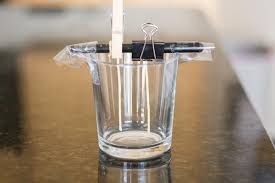
Stage 5 – Secure the Wick
Presently you are going to need to move rapidly for this progression and secure the wick. This progression may test your understanding and innovativeness, yet is significant for making an effective flame.
We like to utilize pencils and elastic groups at our home to make sure about the wicks set up, chiefly in light of the fact that that is the thing that we have around the house.
Yet, you can utilize clothespins, popsicle sticks, or whatever else that will keep the wick centered.
When you have them centered, don’t contact them.
6. Wait for wax to harden
Presently, you simply kick back and let the wax set. To totally solidify it will take 4-6 hours.
You can tidy up the pot and the remainder of the zone while you wait.
Stage 7 – Cut the Wick
When your wax has solidified you should cut the wick down. They ought to be about ½ inch long. You can likewise clean the containers if any wax trickled as an afterthought or around the edges.

Stage 8 – Light your New Candle
Presently sparkle your new light and ENJOY!
Since you have managed the best way to use candles at home you to can get innovative and play around with customizing them.
I have a GREAT Video on Candle Making! CLICK HERE