Express Your Emotions Through Oil And Watercolor Paintings! 6 Top Steps

Watercolor painting is of great fun. Kids just love to paint applying watercolor because it provides them with the best amusement. If you are the one who is not aware of watercolor painting, you should learn the right procedure. It is not a tough task but will need lot of patience to imply the art properly. Beginners might think it to be creepy and daunting, but once you learn the procedure everything will become easy.
This Watercolor painting technique is simple- you just wet the area you want to remove with a brush and clean water. You will find that http://babieboomers.com has been specializing in Watercolor painting for quite some time. Then, blot the paint away with a paper towel. Try using strips of paper to mask off areas of paint, this will produce interesting hard lines and shapes.
In this type of work pre-planning will reduce errors and the target idea will more likely to be realized. Any measured work – enlarging – portraiture – anything technical – animal bird or plant illustrations – are usually best planned beforehand. Professional work to deadline is a pre-planning must.
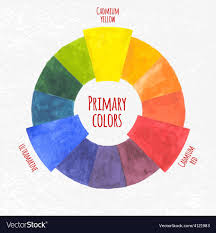
There are two categories of paints to make a choice between when it comes to water colors. This comprises the student and the artist varieties. Since you’ve just started off, the student array of paints would fit your aim far better. Also, you should just pay attention to buying primary colors in the initial stages. Once you’re comfortable using these shades, you may try using other hues in your paintings as well. Watercolors are obtainable in both- pans and tubes.
In this type of work pre-planning will reduce errors and the target idea will more likely to be realized. Any measured work – enlarging – portraiture – anything technical – animal bird or plant illustrations – are usually best planned beforehand. Professional work to deadline is a pre-planning must.
This does not mean you should go out and spend hundreds of dollars on top of the line supplies right away. Start off buying a small amount of good quality supplies until you become more experienced.
One of the best ways to immerse your self in watercolor landscape painting is to find people with the same passion. Search online for any groups or websites for landscape painters in your area. Start chatting and get to know everyone. Many of the artists in these groups love to connect with other artists and plan painting trips. This is a really great way to gain experience.
My Priming Method is simple and extremely effective, and will give you glowing jewel-like colors. Your lights will be delicate and softly blended. Your darks will be luminous pools of transparent color. Let’s take a look at the converse: Simply laying multiple washes on top of each other will leave much of the pigment sitting on the surface of the paper. With each subsequent wash you will find much of that pigment will lift and mix with the new wash, dulling the final color and if determined, you could easily create mud.
Framing watercolors is necessary to their preservation. How this is done is a personal thing but adopting the following suggestions will be more than helpful to set off your work in the best possible way to avoid later disappointment especially in the medium and long term.
The best way to do this is to bring the mind to a point. Remember to relax – not to tense up or prejudge anything or anyone in any way. There should be no sense of what the painting is or should be about. Sense the moment. Mix the paint and let it flow as and where it will.
When the class settled down, the Teacher knew what colors to recommend and why she wanted to recommend them. Questions that she reminded her students to ask were have you decided which color of paints to use and why? Do these colors complement each other? When the colors come together on wet paper what color will they make? After guidance from the experienced teacher the students were able to take home a beautiful watercolor painting.
Want to learn how to draw? Click here

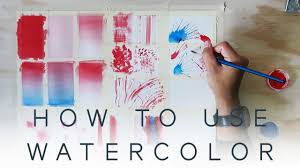
5 Simple Watercolor Techniques for Beginners
Ana Victoria Calderón
Watercolor can be scary for tenderfoots, and even some accomplished specialists think that its difficult. Truth be told, during my time showing the medium, I’ve met numerous gifted acrylic and oil painters who struggle exchanging over to watercolor since it just works so in an unexpected way. With these basic warm-up exercises, you’ll start to see how watercolor truly functions, get settled with your paints, and ideally concoct thoughts for new manifestations.

Wet-on-Wet
There are a few essential approaches to paint with watercolor. The wet-on-wet strategy is commonly utilized for painting scenes, straightforward skies, or delicate watercolor washes on the grounds that the impact gives us a pleasant flowy look that can be applied in various manners. Essentially, we’re adding wet paint to a wet surface. Here’s a basic movement that can help acclimate you with this strategy.
1. Start by wetting your brush with plain water and “painting” two square shapes.
2. The square shapes will be difficult to see on the grounds that there’s no shade, yet in the event that you tilt your head a piece, you will have the option to see where you have applied the water.
3. Get saturated paint from your palette and add shading to your wet square shape. In this picture, I’m essentially sliding my brush from side to side.
4. In your subsequent square shape, simply include touches of paint. This movement is extraordinary for starting to check the measure of water and paint you want to utilize.
5. Next, your paint has started to dry. Perceive how unique it looks? When painting wet-on-wet, we don’t have a lot of command over how our paint responds. This is an excellent part of this procedure; watercolor dries in strange ways.
6. When the paint has totally dried, you’ll see that it’s changed considerably more. It’s typical for hues to show up less dynamic once they’ve dried. Intriguing surfaces additionally show up, which makes wet-on-wet an extraordinary procedure for adding surface to painted shapes.
Wet-on-Dry
Wet-on-dry is utilized to accomplish more exact and characterized shapes. This is the strategy I like most, and, all in all, most representation style watercolors are accomplished utilizing wet paint over a dry region.
1. Start with dry paper. Get some saturated paint with a huge brush and essentially start to paint.
2. The ochre paint I utilized here is very watered down. The mistiness of your paint will rely upon how much water you blend in.
3. You can likewise take a stab at utilizing drier paint. I utilized the base measure of water to get my paint moving, and you can see we get a totally extraordinary surface, a sketch-like completion.
4. Presently, the paint is totally dry. Once more, notice how the hues will in general blur and can appear to be very unique now.
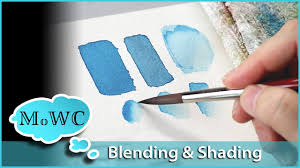
Working up Shading
This movement will assist you with working on working up shading from plain water to an immersed paint blend. We’ll be utilizing only one shading to accomplish various qualities, hoping to make a consistent impact, famously known as “ombré.”
1. Start with a dry region of watercolor paper. Drop a little puddle of water into your palette and a touch of concentrated paint directly close to it. I utilized a medium-sized brush and a touch of green cylinder watercolor.
2. Get a touch of water with your brush (no shade yet) to kick you off. Start painting your strip (it will look straightforward on the paper).
3. Include a smidgen of shade into your puddle of water; make a point to be aware of how much paint you are including. You need this cycle to be unobtrusive and work up gradually.
4. Proceed by painting where you left off with the straightforward water.
5. Rehash the cycle by adding more paint to your underlying puddle of water each time. Prior to getting more shading, make sure to flush and pat your brush on a bit of material or paper in the middle of so it’s spotless.
6. When you arrive at the finish of your portion of paint, your watercolor blend ought to be very thick and the paint ought to seem concentrated and as obscure as it can get.
7. Presently you have a decent change from water to concentrated paint. The objective is for the cycle to be sensitive, with no cruel changes starting with one worth then onto the next.
8. Rehash the same number of times as you wish. Attempt this movement a couple of times to try different things with various hues and to start to fondle open to building shading.

Making Slopes
This action is like structure up shading, yet as opposed to working with plain water and various estimations of one shading, we’ll be working with two hues and gradually changing from one to the next. It’s an incredible strategy for painting skies and dusks.
Make certain to utilize hues that are near one another on the shading wheel to make concordance; in any case, your inclination will seem sloppy. I utilized green and yellow; other great blends are blue and purple, red and orange, or blue and green.
1. Blend two separate hues next to each other. The paint ought to be neither too weakened nor excessively focused; focus on a 50/50 proportion of water to paint for each shading.
2. Begin painting your portion of shading utilizing unadulterated yellow paint.
3. Clean your brush. Get only a smidgen of green paint and blend it into your yellow blend.
4. Refocus on your first brushstrokes. The change from yellow to a somewhat greener yellow ought to be delicate and unpretentious. Attempt to stay away from cruel changes in tone so the inclination doesn’t look rough.
5. Gradually, continue adding more green to your unique yellow blend. In this activity, the genuine work occurs in the palette.
6. Before the finish of this paint strip, your unique blend ought to totally changed into unadulterated green and you’ll have an excellent angle of shading.
7. Attempt this the same number of times as you feel important and explore different avenues regarding diverse shading tones. You may get thoughts for canvases by evaluating various hues.

Getting Precise
This action is a straightforward method to work on painting around edges of shapes in a controlled manner.
1. Paint straightforward shapes around your dry bit of watercolor paper. I picked circles, stars, and a moon, yet you can pick any straightforward shape you like. Triangles, precious stones, hearts, and squares can work, as well.
2. Utilizing an alternate shading, start painting around these shapes. You’ll need to utilize two diverse measured brushes here: one for littler more definite regions that are hard to reach, and a bigger round brush when you’re rounding out bigger territories.
3. Try to get ready enough blue paint (around 50/50 water to watercolor). For a superior stream, keep the blue territory of your work of art clammy, so you can regroup each time.
4. Get truly near each shape. The objective is to paint as close as possible without really contacting the principal shape. You will have exceptionally fine white lines between the shapes and the foundation.
5. Another approach to rehearse is by painting simply inside the edge of your paper, making a fringe. Notwithstanding chipping away at brush control, you will begin to see lovely watercolor surfaces showing up. This relies upon how much water you use, the sort of paper, and how quick you move.
6. Rehash this straightforward practice the same number of times as you feel fundamental. It’s an incredible method to get into the representation style watercolor groove.
How to Watercolor in Six Easy Steps
| 1 | Get proper tools: set of watercolors, brushes, jars of water, pencil, white eraser, pen, water color paper, salt |
| 2 | Step One: Draw in Pencil |
| 3 | Step Two: Paint with Water |
| 4 | Step Three: Flow in your paint |
| 5 | Step Four: Paint everything but don’t let your wet shapes touch! |
| 6 | Step Five: Paint your background |
| 7 | Step Six: Add pen and ink! |
*Source: Secret-Agent-Josephine.com
I have a GREAT video series for you on this subject! CLICK HERE